Clean Your Aerator in 3 Easy Steps
Most tap water contains minerals that leave deposits as water evaporates. You may have noticed deposits on fixtures, glasses, or eating utensils. Water flow is reduced when minerals or other deposits fill the holes in the aerator’s screen.
It’s a good idea keep up on maintenance and clean your faucet aerator every six months. You could also choose to replace the faucet aerator once a year. They are inexpensive and easy to install – the key is to make sure they function properly.
Step 1: Start by gathering the following supplies:
- Rags
- Wrench
- Old toothbrush
- Safety pin
- White vinegar
- Small tub or glass
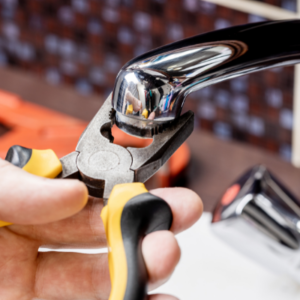 Step 2: Remove the Aerator from the Faucet
- Place the rag in the sink to prevent small parts from falling down the drain.
- Use your fingers to remove the aerator from the faucet. If you need to use a wrench or pliers, wrap another rag around the faucet to protect it from scratches.
- Take the aerator apart, noting the order of assembly for later. It may help to take pictures with your phone. Your aerator may have several parts, including a housing, rubber washer, screen, or mixer.
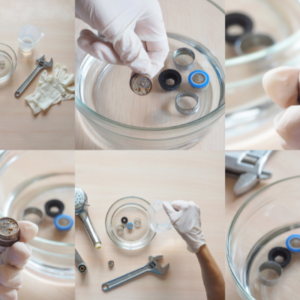
Step 3: Clean and Replace the Aerator
- Place all parts in a container with vinegar. Soak for about five minutes.
- Scrub the parts with an old toothbrush. Use a pin to poke through any remaining clogs in the holes in the screen or mixer.
- Rinse and reassemble the aerator and screw it back into place on the bathroom or kitchen faucet.
 When you clean a faucet aerator periodically it improves the water quality and flow from your tap.
If your water is brown or rust-colored, there could be a problem with the pipes or other plumbing fixtures. We suggest you call Trident Plumbing at: 972-900-6660 or email them at: [email protected]